Once upon a time, we lived in a world where websites had screaming neon colors and an overabundance of text to entertain and educate us. The Internet (think Geocities…) was a bright and shiny new place for us to play and, as web developers, we did the best we could, considering the circumstances: HTML, low screen resolution, limited color sets, and nothing to really work from aside from real-life print examples and our imaginations.
Fast forward to 2016 and our story has come a very long way. Computers, mobile devices, smart TVs, and even some cars now keep us connected to the Internet 24/7.
And as the technological devices we use to access the Internet have developed, so too has our ability to create beautiful, effective, and unique websites. If you're too young to remember what it was like in our not-so-long-ago and what it is like in our present day tale, take a look at this:
Google then and now.
While Google's look has always leaned toward the simpler side of things, you can see what a world of difference nearly 20 years has made. Whether it's Google's website or someone else's, there is much more thought and planning put into the design of every piece of a website now… because we have the ability to do so.
For businesses, a website serves as its online identity and is often the first point of contact they have with prospective customers. To have a website come across as an afterthought or something shoddily thrown together could be just as detrimental as a marketing director answering a client's call with “What do you want?” When executed the right way though, a website can be a highly effective marketing and sales tool.
With two decades of amazing advances in web design and development behind us and amazingly helpful CMS like WordPress at our disposal, businesses no longer have any excuse to not have an awesome-looking or well-functioning website. But is it enough anymore to just have a well-made website?
No!
Your audience expects a lot more from you these days. You may be able to draw them in with a perfectly executed web design, but if the content doesn't resonate with or intrigue them, you might lose their interest all the same. That's why websites need to tell a story. What story, you ask? Well, that depends. What do you offer? How can you put your audience into the seat of the story, to make them relate to the story, to yearn to find out what happens (to them) in the end? The story is yours and you'll need to find the best (and most creative) way to tell it through design.
PERFORMANCE
Super speed and performance with WP Hummingbird
Lightweight and fast, Hummingbird caches, minifies, combines, defers and compresses, making optimizations in line with Google PageSpeed, and turning your website into a lean, mean, speed machine.
There are many reasons why an author may write a story, but there is always one goal they hope to achieve: to get the reader hooked. It could be a bloody tale of revenge or a story about a little girl and her puppy walking home from the beach. It doesn't matter what the underlying plot is, the author simply wants the reader to feel something about the story.
Businesses are no different when you think about it. Their goal is to sell a product or service that can help improve their customer's lives in some way. You know this. That's why you believe in your brand. But it can often seem difficult to get that point across to an online audience when all you have is a bunch of words and images on a website to work with. Those words and imagery can be extremely powerful in telling your story though, especially when carefully constructed.
Find Your Story
Many businesses may see this and think, “I'm not a writer and we definitely don't have a story to tell. We sell dog ice cream.” But that's not true. Even the simplest of business models-from the independent freelancer to the large enterprise-have a story to tell. It just might not be their own.
Let's say you are in the business of selling ice cream for dogs, you can think about your website's story in a number of ways:
Story #1: You share an illustration of Mr. Bear, a German Shepherd puppy. Mr. Bear is playing in the park with his friends when the ice cream truck comes by. His parents tell him he can't have any because that type of ice cream isn't good for him. Then you see Mr. Bear look sad as he watches his friends get their ice cream cones. But wait… you have a solution! [Insert image of a happy Mr. Bear eating your ice cream here.]
Story #2: Infographics are a great way to tell a story without having to create an official narrative. You can use oversized statistics and strong, but simple imagery to move your site's visitors through a their journey. Basically, this is what your dog's life would be like without dog ice cream (e.g. 25% less responsive to commands) and then this is what your dog's life is like with dog ice cream (e.g. 10% increase in energy and less visits to the vet required).
Story #3: You could also tell this story as your own. Maybe Mr. Bear really is your dog and maybe you felt really bad that he couldn't eat ice cream like his other puppy friends because he was lactose intolerant. That's why you were inspired to create your own brand of dairy-free dog ice creams.
No matter which angle you take, it's all about making a connection with your audience. That's why businesses have websites: they want to virtually connect and communicate with their audience in the hopes of selling their brand. With the right story in place and with the proper design executed to tell it, you can bring your visitors out of the passive reader role into something more interactive.
Focus on the Benefits
Let's take a moment to review the benefits of a storytelling approach for your website's design:
Create a Clear Vision: In order to tell your business's story, you have to truly understand who your brand is, what it aims to accomplish, and what your audience will really get out of it. If you don't understand your brand's value, developing a story for your website is definitely going to help you refine that vision.
Develop an Identity: Once you begin storytelling, you're never going to want to stop. Having an interesting and consistent brand identity isn't something that will stop with a single animated video or homepage storyline. This is something you'll want permeated through every part of your business's identity, virtually and in the real world.
Foster Real Engagement: Calls-to-action are used in web design in order to call your visitors' attention to what you want them to do. Contact us. Download this. Fill out this survey. But storytelling allows you to insert them into your story and, in a way, more genuinely engage with them.
Set Yourself Apart: Everyone has a unique story to tell, but not everyone knows how to translate it to their website (or their brand's identity, in general). By using storytelling principles to build your website, you are setting your website and business apart from the competition.
Enhance the Overall Design: When applying storytelling principles to a website's design, you're required to plan everything out in advance. Without that clear vision, it'll be difficult to effectively share your story online. So by taking the time to plan and prepare, your website will ultimately be more thoughtful and intentional in its delivery.
Of course, all the benefits above can only be achieved if you're willing to put in the time, effort, and creativity in order to create an interesting story that your audience can relate to.
If your website and/or brand doesn't have a clear vision…
If you're confusing “storytelling” with “pull out all the stops”…
If your business is too young and doesn't quite yet know its audience…
Then the storytelling approach might not be right for you. And that's fine. Just hold onto this article for future reference and jump back into it when you're ready to go.
How to Use Storytelling Principles to Build a Better Brand Story… and Website
Any great writer, teacher, or even movie critic will tell you that there are five critical stages in a story's plot. Regardless of whether you'll be telling a traditional “story” (like in Story #1 above) or conveying your brand's story through another approach, the goal should be to hit each five of these goals-and in this order-as your visitors traverse through your website.
We're going to explain what the stages are, provide you with some tips for how to create your story in that stage, and also give you some real-life examples that execute this stage well.
Ready?
Talent Garden is a coworking network for digital and creative professionals.
In the Beginning…
“In the beginning,” “Once upon a time,” “In a galaxy far, far away”… These are all ways you've seen stories start out before. This is what is known as the Exposition or the setup of a story. You meet the characters, discover the setting, and realize that there's something more going on than meets the eye.
For websites, this is where you will establish the conflict. While the word “conflict” may have a negative connotation to it, that's not always the case in storytelling. Basically, it all depends on what you're trying to solve for your visitors. Whatever it is, your website's story needs to start there.
An Example:
Talent Garden's website is shown above. You can see that what they're offering is a coworking space. For their website's story, they've chosen to rely heavily on background imagery that speaks well to their audience: the freelancing community and other work-from-home individuals who want a place to work alongside others. They then use messaging that is very simple and clearly explains the “conflict.”
Execution Tips:
Your story should start right away, not tucked away on some internal page.
Use very strong and clear copy to set up your story. There should be no confusion about what you do or why visitors should be interested in learning more.
Use big lettering to put the emphasis on what's most important.
Let the background design, color, or image set the tone of your story.
Utilize negative space in order to bring focus to the story you're telling.
Select color choices that will invoke the right emotions from your audience.
Consider creating a brand “mascot” to guide your visitors through the story.
…There Was a Problem…
The next part of your brand's story should deal with the actions arising from the conflict. Since the very beginning of your website (the top of the home page or the first part of a parallax scrolling site) dealt with the setup, it's now time to build the tension around the conflict. This is what's known as Rising Action.
When it comes to using design to tell this part of the story, it's all about action cues. Whether you have an actual story to tell or you're simply presenting your site's visitors with a logical set of information starting with “This is the problem you face” to “This is how we can fix it,” you're going to need to guide them through the storyline visually.
An Example:
The National Geographic Channel's Killing Kennedy website. The site's design uses colorful sliding icons and text boxes to share the growing plot points and build up tension. You already know how the story between Kennedy and Oswald ends, but this site has done an amazing job in using design to guide the reader downward through the story and into the thick of the action.
The Killing Kennedy site uses interactive elements to engage readers.
Execution Tips:
Jump right into the action as soon as you've established the setting. Action, for most websites, is going to come in the form of movement and colors rather than actual action-packed dialogue.
Use simple navigation so your story is easy to follow and logical.
Each scroll, section, or page should serve as a new “plot point.” Don't try and stuff too much into a single space.
Keep tight control over the pace of your story with less text and more emphasis on visual cues.
Use bright CTAs or animation to move the readers through the story.
…And Out of the Blue Something Happened…
The very middle of your story should be the climax or high point. So in the case of Mr. Bear's story from earlier, you could reveal that dogs who receive ice cream during training remember commands 33% better than dogs who only receive biscuits. That stat should provide some sort of turning point in your story where visitors should feel surprised or shocked by the discovery.
Physical or emotional, you want the climax to elicit some sort of response from your audience, and you'll want the design of your website to reflect that too.
An Example:
From start to finish, the Make Your Money Matter website does an amazing job of telling the story of their audience's pain. It's in the climax though that they really outdo themselves.
The tension builds so wonderfully from the moment you start scrolling, that by the time you get to the climax, you might feel too nervous to fill out the calculator. But it's a simple request-simply fill out two fields. And then all they ask of you is to click a button (with an ominous looking color). The resulting screen tells you how much money the bank made off of you. Whatever your resulting emotion, you won't be able to help but feel compelled to continue through the journey to see what happens next.
Execution Tips:
This is your big reveal. It doesn't need to be earth-shattering, but it needs to be something that makes your visitors stop and wonder what this means for them.
Use a surprise action to engage visitors at this crucial moment. Play a video, use sound effects, include a shocking color, or interact with them through a form of gamification (like the calculator Make Your Money Matter uses).
…But Then They Started to See That Things Were Changing…
Think about your website (or your story) like a mountain. The exposition would be the base of the mountain. The rising action would be your climb to the top of the mountain. The climax would be the peak. And then you've got to make your way back down to complete your mission. That is the falling action.
In the case of your website's story, this can be any sort of action or steps that will logically direct visitors from your big reveal down to the final goal. Some websites lose it at this point and just start throwing random testimonials or social media feeds into what was previously a logical flow of information. Don't interrupt your visitors' train of thought. Make sure to keep them on track with the falling action.
An Example:
La Moulade's website is the epitome of minimalistic design. And to top it off, it has one of the best examples of falling action I've seen.
After quickly stating who they are and then bringing visitors to their climax (a bicycle bell rings to let you know you're there), they guide you through snapshots from their creative portfolio. That's it. Their falling action is just a portfolio. No words. All images. And it works! Whether you're compelled to click on any of them to see more or just scroll to the end to find out what's at the bottom, they've found a simple and creative way to hook you.
Creative studio La Moulade's website is minimalist with lots of fun interactive touches.
Execution Tips:
Whatever you use in the rising action to guide visitors through your website, the falling action should mirror those same movements, designs, or CTAs.
There should be a simple flow from the climax to the conclusion of your website.
Keep the falling action to a minimum. Once you've hit the climax, your visitors are going to hope for a speedy payoff.
Use strong imagery or typography to keep the interest there, but don't overdo it.
…And That They Had a Solution to Their Problem All Along
The final stage is the end of your visitors' journey and the resolution of your story. Once your visitors have reached this point, there shouldn't be any remaining questions. They understood the story, they realize why it relates to them, and they feel compelled to now take the action you're requesting. The design piece of this will translate simply enough: give them a clear call-to-action that wraps up the journey and gives visitors an action they'll want to pursue now.
An Example:
Zensorium has a very simple product to offer, but that doesn't prevent them from sharing their story through well-crafted imagery, simplified text, bright swatches of color, and a logical progression of information. You can see this very clearly in the structure of their home page.
There is a rotating banner that takes up two-thirds of the left side of the page. It goes through bright and yet calming imagery that takes you through the basics of who they are. On the right-hand side, however, the images stay put (unless you scroll downwards). That is their resolution. Their goal is for you to purchase their products. So by engaging visitors with a simple timeline on the left, the static imagery on the right becomes the most logical final step.
Zensorium uses storytelling to sell its health and fitness trackers.
Execution Tips:
The resolution needs to be simple. Either a call-to-action box or landing page that lets visitors know: “This is where this journey ends. It's your turn to take the next step.”
Make sure the action requested is simple. Fill out this form, purchase this, call us now, etc.
Wrapping Up
Developing a story for your website and brand doesn't necessarily mean you need to create some off-the-wall character whose adventures your visitors will follow through the site–though that might be pretty cool, too. Storytelling is about creating a unique journey for your website visitors-a journey that reflects the experience they'll have when they engage with you as a brand.
So take some time to really think about who you are and what story will be the most effective at getting visitors (and prospective customers) to relate to you. Then you can put all of these storytelling design principles into play.
Recently, one of our users asked if we could cover how to create a custom Facebook feed in WordPress? You can display Facebook posts from your page or group on your WordPress site to improve engagement. In this article, we will show you how to create a custom Facebook feed in WordPress.
When and Why You Should Create a Custom Facebook Feed in WordPress
Facebook is the largest social media platform in the world. As a website owner, you may already be engaging with your audiences on Facebook through your Facebook page or by creating a Facebook group.
However, all the posts you make on Facebook are not visible to the people visiting your website. By adding a custom Facebook feed you can show what's happening on your Facebook page or group to your site visitors.
Then you need to use 123654123654123 as your page ID.
If you want to add a group, then you will need to enter your group ID. Simply visit Find My Facebook ID website, and enter the URL of your group in the search box. The website will reveal your Facebook group's numeric ID.
The next thing you need to enter is an access token. The plugin will work even if you don't add your own access token, however it is recommended to generate it and add it here.
Simply visit Facebook developers website and click on the create new app button.
This will bring up a popup where you need to enter a name for your app. Provide an email address and then select a category for your app. Click on the 'Create App ID' button to continue.
Facebook will create an app for you and will redirect you to the app's dashboard. You need to click on Tools & Support link at the top.
This will bring you to a page with lots of resources on how to use Facebook apps. You just need to click on 'Access token tool'.
Clicking on the link will take you to a page where you will be able to see your app's access token or app token.
You can now copy and paste this access token to the custom Facebook feed plugin's settings page.
Under the settings section on the page, you need to select whether you are showing a group or a page. You can also choose the number of posts to display, timezone, and language settings.
Don't forget to click on the save changes button to store your plugin settings.
You can now create a new post or page or edit an existing one where you want to display your Facebook feed. In the post editor, you need to add this shortcode:
[custom-facebook-feed]
You can now save your page or post and preview it. It will fetch and display latest posts from your Facebook page or group in your WordPress page.
Showing Multiple Facebook Feeds in WordPress
Let's suppose you want to display more than one custom Facebook feed on your WordPress site. The plugin's settings only allow you to add one page or group ID.
However, you can easily use the shortcode to display any other custom Facebook feed you want.
Simply add the shortcode like this:
[custom-facebook-feed id=wpbeginner]
The plugin's shortcode comes with a whole range of parameters. You can visit the plugin's website to see the complete list of parameters that you can use.
How to Customize The Appearance of Custom Facebook Feed
The plugin allows you customize the appearance of the custom Facebook feed on your website. Visit Facebook Feed » Customize page to edit the customization settings.
The customize section is divided into different tabs. Each tab has its own options, you may want to review them to customize the appearance of your custom Facebook feed.
According to a study conducted last year, more than half the freelancers interviewed expected to continue to increase their income, while over a third of them indicated an increased demand for their work.
What's their secret, and what does it mean for you? There's actually no secret at all. It's a simple fact that 2016 is a great time to be a freelancer, especially a web design freelancer. The demand for the type of work you do is there, and it is increasing. The market is changing, not only domestically, but globally, and you can be a part of it.
Sliders and carousels were a really hot design trend a few years ago. You would've been hard-pressed to find a website that didn't have some sort of rotating element on the homepage – especially above the fold.
But then something changed. Designers and developers started to abandon sliders for static imagery. As the interest in minimalistic designs and longer scrolling websites grew, sliding banners became a perceived distraction and threat to the rest of super simple designing. And if designers had chosen to apply any sense of movement to a website, it was contained in a parallax scroll, animated icons, or a video player.
Still, there are some designers who will argue that sliders and carousels are effective design elements that help improve user engagement, when used correctly. We're going to explore the validity of this argument today and give you pro-sliders some helpful tips and tools to use in order to ensure user engagement within your website's sliding elements.
To Slide or Not to Slide, That is the Question
Most design trends will face doubt or criticism at some point as newer, cooler ways of web design take over. So for many designers who are focused on simplicity right now, it may be difficult for them to understand how rotating content can fit into that ideal.
To carousel or not to carousel?
Not to Slide?
Here are some of the most common arguments we hear from the naysayer camp:
Slow to Load: The addition of sliders and carousels slows down a website's load time, which will not only drive visitors away but will also negatively affect SEO.
Bad for SEO: Since so much content is jam-packed into a single slider, it's difficult to optimize the page and SEO for all of that content.
Unnecessary Distraction: The rotation of sliders keeps visitors distracted from the content around it.
Difficult to Use: Multiple slides give visitors too many options to keep track of and it'll require too much effort to dig back through the slides to find the one they want.
Interrupts UX: For visitors who prefer a quick vertical scroll for their content, sliders can wear on their patience as they have to sit and wait for each one to rotate through.
Poor Click-Through Rate: According to some studies, sliders are ineffective at getting visitors to click. While visitors may be interested in reading one or maybe even a few slides, most don't take any action.
Unattractive: Many designers believe that sliders and carousels look tacky, especially when used to promote advertisement-looking images and messages.
Many times, the slider and carousel opponents will cite the 2013 study conducted by Erik Runyon on the Notre Dame University website. In his study, he tracked information on the number of clicks for each slide, the manual rotation of slides, as well as the performance of auto-forwarding slides. These are the numbers most anti-sliders will bring up:
Of the total site visitors, only 1% clicked on a call-to-action (CTA) in the slider.
When someone did click on a slide, 84% of the clicks were on the first one. All subsequent slides received 4% each of the total amount of clicks.
If you read the one-page study closely though, you'll see that Runyon isn't making the argument that carousels are a weak or even obsolete design trend. In fact, the other stats included in his study (which most people leave out of their argument) showed that visitors were more receptive to carousels when used on different types of websites or when used in other ways (auto-forwarding vs. manual rotation).
Like with anything in design, there's a proper time and place for everything. You just have to know when it's right for you.
To Slide?
Now, let's take a look at the argument for the supporters of sliders and carousels:
Space Saver: Carousels allow for a large amount of images or content to exist within a single space instead of forcing visitors to scroll down a too-long page.
Reduce Clutter: For some websites, it's important to showcase different products, work samples, team members, and more. Sliders can reduce the clutter which may inevitably come with all those moving, yet related pieces.
Attention Grabber: Adding the right type of movement to a website's design can help draw visitors in to high quality and relevant content.
Provide Perspective: Some websites have a product or service that needs to be highlighted from different angles. A great example of this is a phone retailer who wants to display a number of images of their mobile devices from different viewpoints.
Multi-Purpose: While the University of Notre Dame's website didn't work well with the carousel, there are other business types that will. Retails, freelancers, and others looking to highlight their products and services (rather than random promotions) can benefit from a sliding design element.
Video Replacement: Video is “in” right now… but it's not that affordable of a marketing investment for smaller businesses or those with a tight budget. Slideshows are a great alternative that still allow for creativity in design and movement.
For those that support the slider and carousel movement, you should check out this study conducted by Mobify. While the results cannot be placed side-by-side with the Notre Dame study since the variables don't align, the end results do show that, when used in the right setting, carousels work very well with an online audience. Here are some of the results that came out of this experiment:
The very nature of e-commerce websites makes them a better breeding ground for carousels than education websites.
Mobile users may be more receptive to a carousel because it's easier to swipe on a device than to click or wait for auto-forwarding on a desktop.
Visitors find carousels showcasing a variety of marketing messages as irrelevant and too salesy in the wrong setting.
The definition of “success” (number of clicks on a CTA vs. number of clicks to the next slide) is relative. You just need to have a solid understanding of what they really aim to achieve.
While the results from the Mobify and Notre Dame tests are not definitive proof regarding the performance of carousels and sliders on a website, they do demonstrate one very important fact: Designers and developers need to know their audience fairly well before applying any design principle to a website. It's ultimately the pains and goals of your customers and prospects that drive them to visit the website in the first place. If a carousel can be effectively used to deliver content around those ideas, then there's a good chance they'll be well-received.
SITE MANAGEMENT
Manage multiple WordPress websites with The Hub
The Hub is your mission control for monitoring the vital stats of all your sites, including uptime, performance and security. Add as many sites as you want – including Multisite networks – and receive instant security alerts, run performance scans, and get notifications when any of your plugins or themes need to be updated.
15 Ways to Add Value to a Website with a Slider or Carousel
Your website is expected to function properly. That's why many of the concerns of anti-sliders are valid. If you're using a slider for the sake of appeasing a client just because they really want one or you just haven't taken the time to research the tips and tools you need to properly pull it off, you could end up putting your website's performance and reception in danger.
If user engagement is what you're looking for, then the user experience always needs to be top-of-mind in web development. So when adding a slider to your website, keep the following tips in mind:
#1: Optimize Placement
When sliders came into prominence, they would've sat right at the top of the home page where most designers currently place hero images. As a WordPress developer though, you know there are other areas of the website that have the potential to make good use of denser sliding content.
The Zappos websites features a centrally placed slider.
#2: Consider the Size
Do you need to include a full-width slider or is it taking up unnecessary space? Consider the purpose of the slider, the size of the images within it, and the balance it can create with the rest of the elements on a page to determine what will be the best size for it.
#3: Use High-Value Content
If the studies above proved anything, it was that your visitors want to view content that provides some sort of value to them. Make sure the images and copy used in your slider reinforce your website's mission and messaging and give visitors the motivation to look through it in its entirety.
The Visit Philadelphia website features professionally shot photographs of the city.
#4: Select High-Res Images
In general, it's a bad practice to use images of low resolution or poor quality on your website. The same should apply to a slider or carousel-especially since the big draw for this type of design element is usually the photos included within.
#5: Keep Text to a Minimum
Sliders and carousels are fantastic at showing off imagery, but text can detract from that experience. Busy images can often make text placed on top of them hard to read. Also, if a slider rotates too quickly, visitors may not have enough time to read. And then you also need to consider that text embedded in an image probably won't display properly on mobile devices. If possible, avoid using text as it will only complicate matters. If it can't be avoided, try to keep it to a minimum.
#6: Pay Attention to the Scroll
There are a number of ways you can approach scrolling controls. The decision to choose one over the other usually depends on the content contained within the slider. Auto-scrolls work fine for image-only sliders, so long as the scroll doesn't happen too quickly. Your best bet may be to force-stop the slide as soon as someone clicks or views the slider. It will then be up to them to click or swipe when they're ready for the next slide.
We use a slider on our homepage (when you're logged out) to display testimonials.
#7: Give Visitors Control
Whether your slider is an auto-scroll or manual scroll, make sure slider controls exist for when your visitors are ready to take over the scrolling experience. Keep in mind that arrows, buttons, and dots can distract from the content in the slide, so see if you can find a way to display them only once a visitor hovers or clicks on a slide.
#8: Create a Subtle Slide
Sliders don't need to be jarring in their motions in order to gain attention. There are a variety of transition movements that are much subtler-like a fade-that will still grab attention enough to get your content viewed.
#9: Emphasize the Important Stuff
In the contrasting studies mentioned above, they both noted that the first slide is always the most looked at and clicked. That's why it's important to sort your slides strategically. If there is a product or service element that is most important for your audience to see, put it in the first position.
#10: Limit the Slides
On a related note, there will be some visitors who want to view more than just the first slide or image. However, that doesn't mean their patience won't wear thin after a while. Use your slides to share your message, but be brief. Cap it at four slides where appropriate.
#11: Focus on Speed
It's always difficult to get excited about adding more images to your website when you already know how much the current ones bog down your site's speed. So if you're going to use a slider, make sure you have a good image optimization tool to keep them from slowing things down.
#12: Customize Each Slide
If you're going to include a CTA on your slides, try to keep the design and placement consistent for each of the CTAs. However, if each slide links to a different service or product, you might want to apply a unique color to each. If someone wants to scroll back through the slides and find the one they were interested in, the colors will more easily set them apart from one another.
#13: Consider Accessibility Obstacles
There are a number of accessibility considerations you'll need to take into consideration before adding a carousel to your website. W3C has done a great job in detailing what you'll need to do in order to make your carousels keyboard- and screen reader-friendly.
#14: Make It Responsive
Carousels and sliders can be tricky to pull off on mobile devices if you're planning to include text, oversized images, or scrolling buttons/arrows. There are ways to make this work though, so be sure that you start by using a slider plugin that advertises itself as “responsive.”
#15: Use Plugins
Last, but definitely not least, you'll need plugins to help you create your website's slider, capture the desired effects you want it to have, and optimize the content for high performance. Here are some of our top picks:
WP Smush
If you don't already have a way to compress your website's images, this is a great place to start. This plugin will automatically downsize and optimize the images you use inside and outside your slider, and ensure they never get in the way of your website's load time or performance.
Typical website designs call for no more than 3 or 4 columns of horizontal widgets or blocks of content. With a carousel though, you can now showcase multiple batches of content within a single space. In addition, this plugin offers various transition effects, pagination options, and is fully responsive.
Interested in Carousel Horiztonal Posts Content Slider?
If you're planning to use your carousel to show off logos-be they of your partners, clients, sponsors, or something else altogether-this plugin will do the trick. You can also play around with greyscale coloring if you want to give all your logos a muted, but consistent look (which is great if you want to keep the focus on your own website's logo and brand). With a drag-and-drop interface, this plugin is an easy one to use if all you want to do is showcase logos.
This is by far the most popular slider plugin available on WordPress at the moment. If you're looking for a responsive slider for your website's videos and images as well as one that's chock-full of customizations, go with this.
So let's say you do end up adding a slider or carousel to your WordPress site, but you're worried it's just clogging up space or driving people to click away. It might just be that you haven't used the right transition effects, colors, images, size, or placement, right? With A/B testing you can test out different versions of your slider before completely dumping it and jumping on the anti-slider bandwagon.
The most important thing to remember in all this is that if you choose to use a slider or carousel on your website, that it needs to serve your audience's needs. It can't just be to stuff a bunch of product images or testimonials into a small space on your sidebar. Everything about your slider element should be strategically designed, from the placement of it to the transition styling. If you have content worthy of displaying in rotation on your site, then make sure you're using the right design element to let it shine.
Recently, one of our readers asked us if it was possible to randomly change background color in WordPress. Colors play an important role in how users see your website and how they engage. In this article, we will show you how to randomly change background color in WordPress.
Method 1: Add Random Background Color in WordPress Using Code
The plugin works out of the box, and there are no settings for you to configure.
You can now visit your website, and you will see colorful stripes as background color on your website. These stripes will fade and change colors elegantly after every 5 seconds.
Method 3: Using CSS to Add Non-Random Background Colors in WordPress
Almost all standard compliant WordPress themes use body_class() function in the body tag. This tag adds a number of CSS classes to the body tag in your theme. These default WordPress generated CSS classes can be used to style individual posts, categories, tags, etc.
For example, if your blog has a category called photography, then you can find these CSS classes in the body tag of the category archive page.
You can change background color of that particular category by simply adding this CSS to your WordPress theme or by using custom css plugin.
Welcome to Plugged In, where we take a look at some of the most popular WordPress plugins in various categories. For more information on WordPress plugins, download our ultimate guide.
Adding beautiful images can completely change the look of a post and make it more appealing. Images can make your content more relatable and easier to understand.
There are a number of WordPress plugins available that allow you to add a beautiful gallery to your work or turn up the SEO on any photos you add. We have compiled a few of the most popular from the WordPress Plugin Repository so you can start building your audience today.
Quickly and easily add image widgets directly into your post. Put your photo next to your blog post or display your logo. The plugin uses the native media manager so you don't have to learn something new. You can link the image, resize the image, and edit the image all within the post.
The best part is, you can choose an image you already have in your media library or upload a new one, just like you would any other media.
Adding images greatly improves any post, but it can also bring unnecessary bulk. WP Smush lets you quickly resize your images and also strips any hidden information they might have pulled in, which can weigh them down. Removing the bulk from any of your media can speed up your site. Once you set a maximum width and height, the plugin will make sure nothing exceeds that.
You can process JPEG, PNG, and even GIF files so no editing is needed.
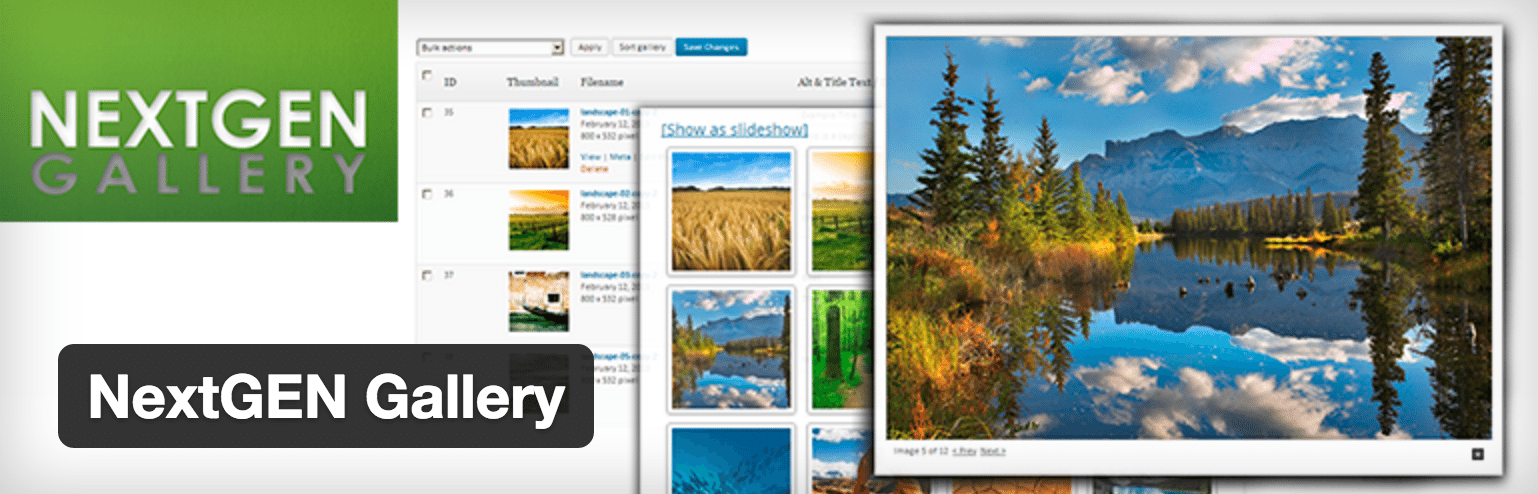
If you are a photographer or visual artist, a gallery is a great way to display your work. NetGEN Gallery has over 1 million active installs for a reason: it creates beautiful galleries in any post. Display a thumbnail gallery so people can see your work at a glance, or go for a slideshow gallery that will cycle through your photos.
You can customize everything about the gallery and add tags to your photos to find them easily. NetGEN will make sure your work gets noticed.
Images are such an important part of a well-rounded website or blog. These three plugins will make sure you're using them to the fullest.
Back when I was starting out as a web designer and developer, my biggest problem was getting stuff to work the way I wanted it to.
I was concerned more about getting things (mostly) working as I expected them to be. Getting things to look snazzy was usually one of my primary goals when finishing a website.
WordPress security was the least of my concerns. Hacking was something I read about, not something I expected to happen to me. SQL injection, cross-site scripting, elevation of privileges and critical security vulnerabilities were just buzzwords in tech news.
But one day, securing my sites suddenly got very important, very quickly when my Facebook feed told me there was a critical vulnerability in WordPress, which was actively being exploited. When I next tried to log in to my site, my credentials were not accepted.
Most of my sites had been compromised by the vulnerability.
I got lucky, though. I had taken one inadvertent precaution, which saved my sites from being fully exploited – I had renamed my admin username – and despite the fact the vulnerability had been exploited on my site, the hackers could not log in. I was using a complex administrator username rather than the default “admin” username the hackers were expecting.
Today I know different.
WordPress security is fundamental: Every WordPress website needs to be fully secured and hardened.
Scroll down to read the full 32-step checklist for securing your WordPress site, or download the checklist as a PDF. Don't forget to bookmark this page and share the checklist!
Before actually diving deeply into securing WordPress, it's crucial to understand the logistics and the reasoning behind a website hack.
It's understandable that you might wonder:
“Why would a hacker be interested in my website? It's just the website of my local business, seen by a few hundred people at most. What are they going to get out of it?”
There are many reasons why a hacker would be interested in your “small” website.
Although some hacking is done for political reasons (defacing of websites to send particular political messages, for example), these types of hacks are typically very localized and not as popular as the mainstream media would make them out to be.
Most hacking attacks happen for more devious reasons.
These days, hacking is part of a ring of criminality whose ultimate aim is to make money through fraudulent means. Typically, after a website is hacked it becomes a middle-man for the distribution of malicious software. Most times, the website owner is oblivious of all of this.
There are frameworks which are bought and sold in the online black market, making it dead-easy to distribute malware through hacked websites.
In essence, your website could become an involved party in criminal activity!
Besides that, there are other negative implications:
Your site could be used as a spamming proxy
A website that is hacked and defaced would most likely result in tarnishing of a brand's reputation. That's besides serious embarrassment
Hacked sites typically overwhelm their hosting server, resulting in the closure of the site. This will typically result in loss of business
The costs of recovering a hacked website can vary from very little (if you have a website backup) to a full redevelopment if your data is deleted/lost with no chance of recovery
Do you think your site is so small nobody will attack it? Think again.
Using the following WordPress security checklist will go a long way towards making your WordPress site hacker-proof.
How Does a Hacker Find My Site?
You might falsely assume that in the millions of websites available online, the likelihood of a hacker finding and targeting your site is extremely remote. After all, your site is only a drop in an ocean of websites, right?
You're horribly wrong.
Hackers don't do this work manually. They employ minions to do their dirty work.
Well, not really minions – they're actually (ro)bots, or programs whose sole purpose is to seek out vulnerable websites.
These programs or scripts are typically run on cloud servers, where they can be setup and destroyed at will leaving little to no traces. The scripts employ means to discover hundreds if not thousands of websites per hour.
The fact that the scripts are bought very cheaply and run on cheap cloud hosting servers make the “investment” worthwhile. These scripts are commonly bought and sold on dodgy marketing forums.
Once a site is found, it is probed for thousands of known vulnerabilities. If your WordPress site has not been fully secured, the likelihood of the site emerging unscathed is absolutely minimal.
Vulnerabilities are continuously being discovered in WordPress and its plugins. That's why securing WordPress is critical to the health of your website.
Securing WordPress: A 32-Step Checklist
With all of the above scary stuff in mind, I want to make sure that you're armed with all the knowledge you can get to fully secure your WordPress website.
Here's a checklist of ALL the things you should be doing to secure your WordPress sites.
This checklist is split into two: The first part includes measures absolutely everybody should be doing – mostly basics stuff, like having strong passwords. The second part goes into advanced measures for WordPress security for those who are really paranoid about security. This is for admins who want to lock the door, put a chain around the door, and put a padlock on it. And then a padlock on the padlock.
Part 1: The Steps Everybody Should Take to Secure Their WordPress Website
Part 2: Securing a WordPress Website for Security Freaks
Well, not really security freaks, per se.
Although these are slightly more advanced WordPress security tips, you typically only need to know how to install a plugin, tweak a few files here and there and in general be ready for the possibility to break stuff. Be ready to revert with backups if that happens.
Part 1: The Steps Everybody Should Take to Secure Their WordPress Website
#1: ALWAYS Keep Your Version of WordPress Up-To-Date
Time and again, you hear of people who disable WordPress core updates because “an update might break one of my plugins.”
This is seriously flawed reasoning.
If you had to choose between a hacked site and a temporarily broken plugin, which would you choose?
Plugins that are incompatible with the latest versions of WordPress are only going to stay that way for a very short time. A hacked site, on the other hand, is a far bigger problem.
It's important to always keep your WordPress core software up-to-date.
Each core update fixes any recently discovered security problems. If your WordPress core software is not updated, your website will be vulnerable to these problems.
If you want to enable WordPress core updates without a plugin you can do it through your wp.config.php file. Add the following line to the file:
The above, however, will also enable core development and nightly updates, which you probably don't want. Add the following to your functions.php file to only get major and minor releases:
Note: We don't usually recommend directly editing your functions.php file. It's always better to create a child theme.
We will discuss later on how to also automatically update WordPress plugins and WordPress themes.
#2: Don't Change WordPress Core
The moment you or a developer edits WordPress core source files, you can no longer easily and automatically update WordPress to the latest version since you'll lose changes you made to your site
This leaves your website dead in the water as soon as a security vulnerability is discovered in your version of WordPress. You'll either have to figure out how to implement the specific fixes yourself, or just leave it unpatched. The former is a lot of hassle and a logistical nightmare; the latter is a serious security risk.
What should you do if you need to change WordPress functionality? Write a plugin of course. This gives you the ability to do whatever you need without compromising WordPress core.
Of course, the same logic applies to plugins and themes. The moment you perform any core tweaking of plugins and themes you lose the ability to update to the latest version. This leaves your site open to hacking.
There are ways and means of getting the desired functionality you need without actually changing the core. If any developer you work with suggests making any such changes, run a mile.
#3: Make Sure All Your Plugins Are Updated
As with WordPress core files, vulnerabilities are frequently found in third party WordPress plugins. There have been plenty of high-profile hacking incidents due to popular plugins containing vulnerabilities.
We won't name and shame them here. Most software is prone to these issues at some point in its existence. It's how the vulnerability is dealt with that shows you what the people running the company are made of.
Many times, as soon as a problem is discovered the developers of the plugin will quickly fix it and release an update.
At that point, it becomes your responsibility to update the plugin to the latest version otherwise you are still prone to a hack attack.
Always keep your plugins up-to-date to ensure you are using the latest version.
Whether you do it manually, or automatically, always keep your plugins updated.
You can enable automatic background updates on WordPress.org plugins using the following change in your functions.php file
This only applies to plugins downloaded from WordPress.org. Any commercial plugin updates need to be handled through their own update mechanism.
Don't neglect the updating of plugins. Keep memberships of plugins active so that you can always get the latest updates.
#4: Remove Any Inactive or Unused Plugins
As the number of plugins you install increases, so do the risks of a vulnerability being discovered in one of those plugins.
Sometimes we install plugins to test their functionality and then forget to remove them from our site. If a vulnerability is discovered in these plugins, your site becomes a sitting duck (especially if you don't follow the advice above and always update the plugins).
Your website is still vulnerable even if that plugin is installed on your website and not being used.
The safest way to minimize the risks is to completely uninstall any plugins you are not using. There is a very easy way to know which plugins are not being used. They are marked as Inactive in the Plugin section of the WordPress admin.
Delete them.
Also, remove any plugins that are active but still not actually being used. Better still, when testing plugins, don't test them on your live site. Instead, create a test copy of your site (on a local test server or somewhere that is segregated from your live server). Perform any plugin testing on that site instead of your live site.
#5: Make Sure All Themes Are Kept Updated
The same logic that applies to WordPress core updates and plugin updates, applies to themes. Securing WordPress means that all themes need to be kept updated to their latest versions. Otherwise, any security holes that have been fixed will remain an issue on your site.
Now you may probably be thinking about all of the changes you've done to the theme and how these will break if you perform a theme update. In reality, changes to themes should be done via child themes, rather than directly to the actual theme. This will allow you to get the latest fixes and security updates without breaking your changes.
If you want to put your mind completely at rest, it would be best to also remove any unused themes. You can check which themes requiring updates from the Appearance > Themes section in the WordPress admin.
You can also enable automatic background updates for WordPress.org themes also using the following change in your functions.php file:
This applies to themes downloaded from WordPress.org.
Any commercial theme updates need to be handled through their own update mechanism. Keep your subscriptions active to ensure you get all security updates.
Note: If tweaking wp-config.php and functions.php files is not your thing, you may choose to enable all automatic background updates using the WordPress plugin, Advanced Automatic Updates. You can use Advanced Automatic Updates to tweak the settings of auto-updates and ENABLE all of the above.
#6: Install Themes, Plugins and Scripts ONLY From Their Official Source
Sometimes when times are tough we might get tempted to “bypass” the payment of a good theme or plugin, by getting it from *cough* less than reputable sites.
Actually, there's no harm in naming and shaming here. Pirating, torrenting and other warez sites are something you need to avoid like the plague.
What we typically don't realize, though, is that many of these pirated themes you download for free have been maliciously tweaked. Most times a back door has been installed in the script. This allows the site where the theme or plugin is used to be remotely controlled by hackers for nefarious reasons.
Would you trust your money to a known scam artist? I wouldn't think so. Same thing for your website. Don't trust “free” WordPress scripts coming from people whose business is stealing other people's work.
So where are the safe sites to go to find quality themes?
WordPress.org is the most common place where plugins and themes for WordPress are found. Commercial plugins or themes can be found at many sites starting of course with WPMU DEV and sites like WordPress.com, ThemeForest.net or CodeCanyon.net
If WordPress security is important to you, stay away from pirate sites.
#7: Choose a Secure WordPress Hosting Service
A good WordPress hosting service goes a long way towards protecting your site from hacking attacks.
Security conscious hosting services will have a dedicated security team who monitor the latest vulnerabilities (even 0-day hacks, i.e. those for which there is no remedy yet) and preemptively apply rules on their firewalls to mitigate any hack attacks on your site.
WordPress hosting is a bit of a hot topic, so I won't be making recommendations here, but the WordPress hosting page does make a few suggestions. These are by no means the only security conscious hosting companies out there. Check out post Web Hosting Review: So Just Who is the Best? for a rundown on the web hosts to look out for.
#8: Make Sure Your Site is Running the Latest Version of PHP
The global WordPress statistics page includes an alarming statistic: Only 1.7% of WordPress installations run on the latest version of PHP (7), whilst about 19.8% run version 5.6, which is still supported.
The rest of the WordPress installations (close to 80%) run on versions that are no longer supported!
The latest WordPress version stats show most installations are using PHP version 5.4, which is unsupported.
Besides the fact your site is not benefiting from performance features released with latest versions, it also means that security fixes that are discovered will not be fixed. They will remain in the wild, ready for exploitation.
Just like WordPress gets a number of core updates, including security fixes, PHP, the underlying engine of WordPress, also gets it fair share of version updates.
Now, updating WordPress core, themes and plugins is a fairly straightforward operation.
Don't forget to update to the latest version of PHP.
On the other hand, updating your PHP version depends largely on your hosting service. A good hosting service should make the latest PHP versions available for use with your WordPress installation through something called with PHP Version Switcher (which is typically accessed through your cPanel account).
#9: Change the Admin Username
Up until WordPress 3.0, the default user name of the administrator login was “admin.” This created a bit of a bonanza for hackers as there was no need for them to guess the administrator username. This is something still valid today. Many people still choose to use “admin” as the default administrator user name.
One of the quickest ways to secure your WordPress admin login against brute force attacks is to change the default “admin” username to something more difficult to guess. (This is what saved my own site from getting hacked).
You can – and should – do this during the actual installation of WordPress.
If your username is currently admin, you should create a new administrator user with a username that is less obvious to guess and delete the old admin user.
You can also rename the user using phpMyAdmin, or choose to run a SQL script on your database to rename the admin user:
This quick and easy WordPress security trick can thwart many simple hacking attempts.
SECURITY
Ultimate WordPress security with WP Defender
Defender protects you against evil bots and hackers with automated security scans, vulnerability reports, safety recommendations, blacklist monitoring and customized hardening in just a few clicks.
When watching a client enter their administrator password, I like to give them their privacy and look away from the keyboard.
But a few years back, I accidentally didn't look away fast enough whilst they were typing the password. To my dismay, I saw them type the following:
1 2 3 4 5 6
To say I was horrified would be an understatement.
Another login and password combination I come across very often, which (nearly) brings tears to my eyes, is this username and password combination:
admin/admin
Besides the fact that anybody looking over your shoulder (like myself) would immediately pick up that password, there is a much more serious reason why you must create strong passwords: hackers know that human beings tend to forget their passwords and are prone to using simple, easy to guess passwords.
They use this to their advantage by having a list of most commonly used passwords, which they try over and over again. This is called brute-forcing a password. Since some people WILL use these passwords, it's essentially a numbers game – and the odds are usually stacked against you.
So always use a strong password.
Here's an example of a strong password: ThizzI5alongstr*ngbuzzw00rd$
Should all your passwords be as complex as this one? Probably.
#11: Don't Reuse Passwords
You should NEVER reuse passwords.
I hear you, it's convenient to have one (hopefully strong) password across the board. You won't have to remember so many passwords but this is very wrong on many levels.
Once again, hackers know this is a bit of a human weakness. It means that when one of your accounts is compromised they have probable access to ALL of the rest of your accounts.
There are plenty of password managers out there that will allow you to create different passwords and store them securely. These are highly recommended.
This is not just WordPress security – this is just common sense.
#12: Protect Your Password(s) By Avoiding Plain-Text Password Transmission
It's a known fact (and a sad reality) that there is all kinds of snooping on internet traffic. Sensitive data such as credit cards and passwords should never be sent in unencrypted form.
There will be plenty of eyes (and analyzers) on your data. Do make sure you protect your passwords by employing the following preventive techniques
Don't send passwords over email, chat, social networks or other unencrypted forms of transmission
Implement HTTPS on your WordPress site, particularly on your backend, to avoid passwords being sent in plain-text. You can learn all about implementing HTTPS in our article How to Use SSL and HTTPS with WordPress.
Avoid using plain FTP when accessing your site. Use SSH or FTPS. The FTP protocol was written in the internet dark ages, and it's not safe to use. Passwords and files are transmitted in plain text and not encrypted at all. FTPS or (Secure FTP), on the other hand, actually encrypts data transmission over FTP. You'll need to setup an FTPS account on your hosting server before being able to do this.
Of course, passwords should not be shared between users or stored in plain-text anywhere no matter how convenient this may be. The practice of sharing logins and passwords flies in the face of security and accountability.
#13: Only Update Your Site From Trusted Networks
Sometimes we tend to take the convenience of finding free Internet Wifi as a godsend.
But paranoid security freaks (like me) tend to shudder at the thought of updating a website from an untrusted network such as the free Wifi connection at your local cafe.
An open Wifi connection is extremely easy to snoop on. You may be getting much more than the “freebie” you thought you were getting if you access your WordPress administration site from a network that is untrusted.
Only update your site from trusted networks, such as those at your home and at your office.
#14: Use a Local Anti-Virus
Imagine you are a computer virus sitting on a desktop workstation. Bear with me for a moment.
Remember that a virus' primary aim is to spread itself as far and wide as possible. What better way for that virus to propagate than replicating itself onto your website. That's pretty nifty, huh?
This is a tactic widely used by viruses. There are many infected workstations out there at any point in time. And of those workstations, there are many who are being used by WordPress administrators.
That's a bit of a worst case combination. A virus on your desktop can quickly spread itself and lead to infection of your site too. It can also snoop on your passwords and, heck, even your credit card and other personal details.
Make sure your local workstation is running a good and updated antivirus to prevent it from getting infected and spreading to your website.
#15: Enable Google Search Console
Whilst this is not a strict WordPress security recommendation, it's something that can supplement the steps you've already taken to bolster your WordPress security.
Google and other search engines have an interest in making sure your website is kept clean of malware. For this reason, the Google Search console will advise you if your website starts to host any malicious files.
Although this is a non-ideal situation where your site would have been hacked already, rather than acting to prevent your WordPress site from being hacked, it's still good to know that malware has been detected on your site so that you can rectify the problem as soon as possible.
Google Search Console is a free service offered by Google that helps you monitor and maintain your site's presence.
#16: Secure WordPress With a Bulletproof WordPress Security Plugin
Many of the steps in this checklist are not trivial. They also might require a bit of technical tinkering with your WordPress website, and rather than securing WordPress, you may blow it up.
We've got you covered, though. Defender is an easy but sure way of securing WordPress with little to no effort from your side. Our security plugin can identify any WordPress security issues currently affecting your websites and provide guidance on how to fix them.
Defender scans your site for vulnerabilities in one click.
Once you've fixed any issues, you can also run a scan to ensure that none of your themes or plugins contain any known vulnerabilities. If they do, you'll be able to take action to fix these issues before they become major problems for your site.
Besides the first time you install it, Defender allows you to schedule regular scans of your websites. If you're like me, you're bound to be very enthusiastic about WordPress security one day, but as things get busy security goes on to the backburner. Automatic scans will ensure you don't go lax with your WordPress security.
There are plenty of other excellent features in WordPress Defender, including blacklist monitoring and alerts, vulnerability reports and customized hardening.
#17: If All Else Fails, Restore From Backup
I've listed quite the checklist of things you should do to secure WordPress and I do understand that it may be somewhat tasking to implement all of these. I also know that in practice, you might lapse and miss a few of them.
But there's one task you really should not skip!
If your timing is unfortunate and your lapse happens at the same time as a hack attack, it's important o have a fall-back plan.
The one thing you should never, ever miss or forget to do is have a WordPress backup plan. Not only in the case of hack attacks, but even in the case of accidents, technical faults and other mishaps. Having a backup ensures you can get your site back up and running again quickly.
Snapshot Pro is like a time machine for your website, enabling you to backup and restore your entire site and even schedule regular automated backups.
Once you've setup a backup plan, you know that if your site is hacked you just need to discover the source of the hack, revert from backup, fix the “hole” that allowed your site to get hacked and you're good to go.
Important note: You should TEST your WordPress backup every so often by restoring it to a temporary location and making sure everything is in working order. The last thing you need is a backup that you think works, but in fact doesn't.
Part 2: WordPress Security For Security Freaks
#18: Limit Login Attempts
We've already discussed brute-forcing of passwords and the fact that using bots is cheap and a good investment for hackers. For this reason, you should put in place mechanisms to block any attempts at brute-forcing your password.
The Limit Login WordPress plugin does exactly this. If it detects a number of incorrect login attempts it denies that user the possibility of trying again for some time. This, of course, makes the brute-forcing attempts much more difficult to succeed and significantly improves your WordPress security.
#19: Enable Two-Factor Authentication
One way of quickly and very easily securing your WordPress logins is by enabling Two Factor Authentication, also known as 2FA.
2FA creates a mechanism whereby to log in to your WordPress backend, besides your regular password, you will also need a time-based security token that is unique to each user. This token also expires after a period of time usually 60 seconds.
The security token is typically generated by an app such as the Google Authenticator.
Because there is a security token unique to each single user that expires, even if somebody knows your login credentials, they will still not be able to log in. This is because they will not have the current security token. This drastically increases the strength of your login and also helps mitigate brute force attacks on your login details.
PHP and WordPress in general use a set of permissions associated with files and folders. Without going into too much detail, there are different types of permissions
Publicly writable files and directories
Files writable by the web server only
Read-only files
In general, your web server typically needs to be able to write files for WordPress to work correctly, whilst the public internet NEVER needs to have write access to your files.
Some newbie or lazy developers, might suggest that you change permissions to be more lax. For example, they might suggest making certain files or folders publicly writeable (777). This will create a serious security threat because it means that anyone can write anything to that folder. You can rest assured that you'll find plenty of nasties in your WordPress site if you do that. They will also probably find ways and means of jumping out of the folder to wreak havoc on the rest of your site.
As a general rule of thumb, files should have a 644 permission and folders should have 755 permissions. The wp-config.php file should have 400 or 440 permission.
If anybody tells you otherwise, be very wary. My suggestion is stop dealing with anybody who suggests otherwise.
How can you check for the correct file permissions? Defender, mentioned above, is a WordPress security plugin that will check and fix file permissions for you as necessary.
#21: Change the Default Table Prefix
This is another remnant of old versions of WordPress. Previously, the name of WordPress tables in the database used to start with the prefix wp_
Although this is no longer default behavior, some people still tend to revert to this (unsafe) practice, whilst older versions of course still have to live with this.
Although this is, strictly speaking, WordPress security through obscurity, renaming the tables from wp_ to a different prefix may still block some attempted SQL injection attacks.
The procedure to rename existing wp_ tables should be done only by your trusted WordPress developer.
#22: Ensure You've Set WordPress Secret Authentication Keys
You might have come across these eight WordPress security and authentication keys in your wp-config.php file and wondered what they are. You may also have never seen or heard about them.
They look something like this:
Auto-generated WordPress security keys.
Essentially, these are random variables that are used to make it harder to guess or crack your WordPress passwords. This is because it adds an element of randomness to the way that passwords are stored in your database which makes them much harder to crack by brute force.
Although most self-hosted sites do not have these in place, you should actually implement them.
2. Edit your wp.config file and in the Authentication Unique keys section you should find a place where to add the unique keys generated in step 1
Do not share or make these keys publicly available. It defeats their purpose.
#23: Disable PHP Execution
One of the first things a hacker would do if they got some kind of access to your site would be to execute PHP from within a directory. But if you were to disable this, even if a vulnerability existed on your WordPress website, this protection would seriously cripple the rest of a hacker's attempts to takeover your site.
This is quite a strong WordPress security step and may break some themes and plugins that might require it, but you should implement this at least in the most vulnerable directories wp-includes and uploads.
This protection needs to be implemented via your .htaccess files. Add the below code to the .htaccess file in the root directory of your WordPress installation:
#24: Segregate Your WordPress Databases
If you run multiple websites on the same hosting server account, you might be tempted to create all of the sites in the same database.
This creates a WordPress security risk. If one website gets compromised, all the other WordPress sites hosted on the same database are also at severe risk of hacking.
When setting up your WordPress installation, the first thing you should do is create a new database. Give it a separate database name, database user name and password, which is different from any other sites or logins you have.
This way, if one of your sites gets hacked the infection won't spread to your other sites on the same shared hosting account.
#25: Restrict Database User Privileges
When setting up a WordPress site for the first time, you may, through lack of information, create a security issue via the database user privileges.
In general, the database user only needs the following privileges: For most WordPress day-to-day operations, the database user only needs data read and data write privileges to the database: SELECT, INSERT, UPDATE and DELETE.
You can thus remove additional privileges, such as DROP, ALTER and GRANT.
NB: Some major WordPress version upgrades might actually need these privileges, however in most cases the general running of WordPress doesn't need these privileges.
It is advisable that before doing any WordPress updates, or installation or updates of WordPress plugins, you have a fully working backup.
#26: Disable File Editing
When you are in the initial phases of creating a website, you'll probably need to tinker around with themes and plugin files. By default, WordPress administrators have the rights to edit PHP files.
Once your website has been developed and is live, you'll have much less need to edit these files.
However, allowing administrators to edit files is a security issue. This is because if a hacker manages to login to your site, they'll immediately have edit privileges and they'll be able to change files to suit their malicious needs.
You can (and should) disable file editing for WordPress administrators after your website goes live through the following command in the wp-config.php file:
#27: Secure Your wp-config.php File
If your WordPress files were to be analogous to the human body, the wp-config.php file would be the heart.
But the fact that it stores such important stuff such as the login details for the database used with your WordPress installation, hashing password salts and other important configuration settings, suffice to say this file is very important. Clearly, you don't want anybody poking around this file.
I strongly recommend implementing specific security measures to safeguard this critical WordPress configuration file. There are disagreements about whether this file should be moved away from its root location, however, most agree this file must be secured.
If you haven't already implemented step #23 above (Disable PHP Execution), then you can add the following to your .htaccess files:
#28: Disable XML-RPC (If You Aren't Using It)
WordPress provides the ability for an application to access it remotely via what is known as an Application Programming Interface (or API). This means that applications can access your site (for benign reasons). A typical example of usage of the XML-RPC is if you are using a mobile application to update your site.
There are also some plugins, which use XML-RPC. For example, Jetpack uses XML-RPC functionality.
However, the XML-RPC can also be used to perform hack attacks on your website.
Many users today believe that XML-RPC is as secure as the rest of the WordPress core, but you can rest assured that XML-RPC is something that hacking scripts are going to be probing. You'll probably find plenty of hits to XML-RPC if you have enabled logging on your site.
If you are sure that you don't have any third party applications or no WordPress plugins are using your WordPress website via XML-RPC, you can choose to disable it using a WordPress plugin.
#29: Disable PHP Error Reporting
When you are developing a website, error reporting is a life-saver. It shows you exactly where an error is coming from so you can quickly fix it.
But, on a live site, error reporting gives crucial clues to hacker to make their life much easier than it has to be.
For example, check out the below error report:
PHP error reporting can give away important information about your WordPress installation.
The error above is giving away the username of the account. That's a crucial piece of information for somebody who is looking to attack your hosting account.
This is only one piece of information – error reporting can typically give really good clues if you know what weaknesses you are looking for.
You can disable PHP error reporting using the following change in your php.ini file:
This ensures that any WordPress security risks created through exposure of sensitive information about your site are mitigated.
#30: Install a Firewall
There are two main types of firewalls, or uses for firewalls. In network security, firewalls are used to segregate different types of networks. Either keeping things from getting in, or things from getting out.
Again, if we use an analogy, a firewall can be described as a bouncer – you're only allowed into a VIP party if you are on the guest list. Just like the bouncer at a party who typically stops people from getting in, software firewalls can be used to keep hackers from getting near your website('s party).
In the case of securing WordPress, we're going to use a Web Application Firewall (WAF) to keep hackers from sticking their dirty little hands (or bots) into places where they don't belong.
There are a number of WAF firewalls but one of the most reliable, free and open-source firewalls usually available with WordPress hosting services is the ModSecurity firewall.
You may want to ask your hosting service to see whether this is available on your hosting service, and enable it if it is. Once it is enabled, your hosting provider or your trusted WordPress developer can typically suggest or implement rules around ModSecurity.
#31: Use a Content Delivery Network Firewall
A Content Delivery Network's primary use is typically to optimize the performance of your site by serving heavy resources fast. You can learn more CDNS in our article 9 Top CDN Services for a Super Fast WordPress Site.
CDNs, however, provide another secondary feature: most CDNs are able to protect against a number of WordPress security issues.
If you are using a CDN (and you should), make sure you are also enabling the security rules provided to improve the protection of your WordPress website.
#32: Monitor Your WordPress Security With Security Logging
If you don't know what attacks are happening on your site, you're hardly likely to be able to stop them, right?
You can improve your WordPress security through monitoring your logs. For example, if you find that most hacking attempts are coming from a specific country, perhaps one that your website doesn't cater for, you could choose to use your firewall to block that country.
This is, of course, a very simple example of what monitoring can uncover.
You can choose to use OSSEC if you have direct access to your hosting server. You can also choose to use a security auditing plugin to keep regular audit logs.
Keeping WordPress Secure
This ultimate WordPress security checklist might give you a bunch of work if you haven't much thought to securing your WordPress website before. The good thing is that these steps don't require a lot of effort to become part of the process of creating a website.
WordPress security is something to be taken seriously. Hack attacks have become the norm. Your website is probably under attack right now.
OK, so you might not put all of the above in place, but the more of these WordPress security measures you put in place the better. Because wouldn't you rather be safe than sorry?