Are you just getting started with WordPress theme development? WordPress starter themes help you get started with a solid foundation. In this article, we have hand-picked the best WordPress starter themes for theme developers.
What is a WordPress Starter Theme
A WordPress Starter theme is a blank theme with minimum design, and a basic or absolutely no layout. These themes usually come with the most commonly used templates in a WordPress theme.
They have code to display posts, archive pages, single posts, comments, but with minimum or no styling at all. This allows theme developers to quickly start adding their own styles to build a totally new theme.
Starter themes are different than a parent theme or a theme framework. Parent themes are fully styled WordPress themes designed to be installed and used on live websites. Theme frameworks provide a lot of hooks and filters for usage in child theme development.
Starter themes do not come with styling, you are not supposed to use them as it is, and they are not frameworks with custom hooks, filters, and template tags.
Instead, you use a starter theme to build a parent theme.
Having said that, let's take a look at some of the best starter themes for WordPress.
Underscores is probably the most popular of all WordPress starter themes. Maintained by Automattic (the company behind WordPress.com blog hosting service), Underscores is a minimalist starter theme written in HTML5 and CSS. The clean code is meant to get out of your way and help you quickly build a standard compliant WordPress theme.
From the folks behind Underscores comes Components. It is basically 6 starter themes for different kind of websites. Currently there is a base, blog, blog modern, portfolio, business, and magazine starter theme available for download.
Bones is a WordPress starter theme developed with a focus on mobile-first approach. It uses Sass and comes equipped with ready to use code for custom post types and custom dashboard functions.
Sage is a modern WordPress starter theme based on Gulp, Bootstrap, and Bower. It uses a Theme Wrapper which helps you avoid repeating the same code in every template. Sage is actively maintained and has a strong following among WordPress front-end developers.
Based on Foundation 6 framework, FoundationPress is a modern WordPress starter theme. It comes with clean semantic code and powerful customization features that make it easier for you to rapidly build WordPress themes.
UnderStrap is a WordPress starter theme based on Underscores and Bootstrap 4. It comes with a mobile first, responsive grid framework, and its super easy to customize.
As the name suggests, Bootstrap Four is a WordPress starter theme based on Bootstrap 4 framework. It provides a clean code base for theme developer to do whatever they want.
Blankslate is a simple and extremely flexible WordPress starter theme. It is designed with developers in mind. It is simple yet comes with powerful foundation for your themes to rely on.
CyberChimps is a fully responsive WordPress starter theme built with Bootstrap. It comes with a touch-friendly drag and drop options panel which allows users to customize their site using touch devices.
Built with quicker theme development in mind, Klasik Framework is a simple starter theme for WordPress. Theme features 9 widget area, 8 custom widget and simple Theme Option for full CMS control
Start is based on Underscores starter theme and Bootstrap framework. It inherits all the code of Underscores and adds Bootstrap magic for rapid front-end development.
If accessibility is a main concern for you, then you will love A11Y'All. It is a WordPress starter theme designed from scratch with accessibility in mind. It includes page templates and customizable menus, header, widgets and background.
Cornerstone is a modern starter theme for WordPress developers. It is based on the popular Foundation framework. It comes ready with custom header, sidebar, widgets, and navigation menu locations pre-defined.
WP-Flex is a blank WordPress theme or starter theme. It adheres to WordPress coding best practices and guidelines provided by WordPress theme review team. This basic theme can be a good starting point for any custom WordPress design.
Quark is an easy to customize WordPress starter theme. It is based on Underscores and Twenty Twelve WordPress theme. It uses Normalize to make sure that browsers render all elements more consistently and Mordernizr for detecting HTML5 and CSS3 browser capabilities.
Nebula is an advanced WordPress starter theme that is more like framework but not completely a framework. It is a starter theme with lots of custom functionality like recommendation engine for 404 and no-search-result pages, and Autocomplete Search, etc.
HTML5Blank is a easy to use WordPress starter theme. It is based on clean HTML5 and CSS3 templates with ready to use code and template tags for you to utilize during your theme development.
In this white paper written for WP Engine, Charles Coxhead of WP Dev Shed delivers a simple framework small businesses can follow to attract and convert qualified visitors and achieve digital marketing and acquisition goals.
What You'll Learn
In this paper, Coxhead examines:
Digital marketing through each phase of the buying cycle
Using popular channels to drive traffic and engagement
Tips for setting up analytics correctly from the beginning
Helpful links to learn more once the framework is in place
Welcome to Plugged In, where we take a look at some of the most popular WordPress plugins in various categories. For more information on WordPress plugins, download our ultimate guide.
One of the wonderful things about WordPress is being able to work for yourself from anywhere in the world. A great way to get involved is with ecommerce. You can create a product and sell it online, reaching a large and significant customer base.
It can seem intimidating to start an online business, but these four plugins make it much easier. Some help keep track of your finances while others allow for easy checkout. All will get you on your way to making a living online through ecommerce.
It wouldn't be an ecommerce roundup without WooCommerce. With over 1 million active installs and it's own conference, WooCommerce is a leader in the WordPress ecommerce world. You can completely customize your site to accommodate any item you're selling whether it's physical, digital, or a mixture of both.
Once you start selling, WooCommerce still has your back. You'll be alerted if you get low on inventory and receive reports on how your business is going. This is a complete plugin that will grow with your company.
You have a product to sell and your website looks great, now you need a way for people to start buying. This plugin supplies you with your shopping cart. It gives you the ability to sell on iPhone and Android, and offers unlimited storage and backups.
You pay as your company grows, so the plugin starts out free when you only have 10 products and the cost increases as you start selling more.
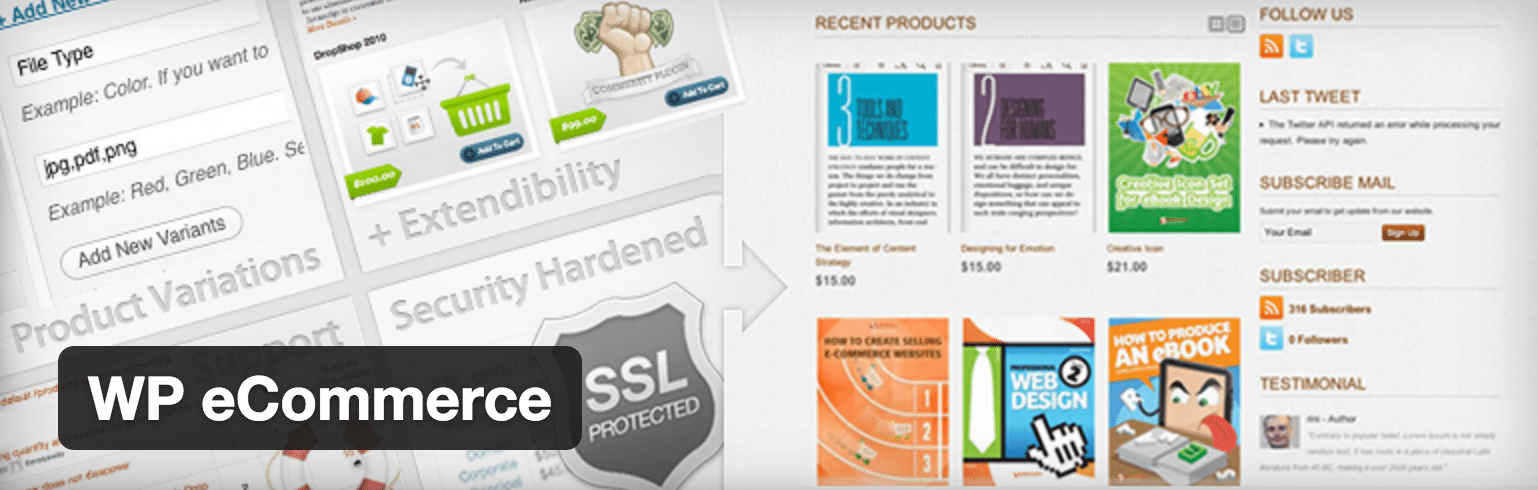
Because you'll be selling online, shipping is a crucial part and WP eCommerce offers strong shipping tools that partner with popular couriers. The plugin also offers built-in marketing tools so you worry less about getting customers and more about making excellent products.
It is completely customizable and integrates with many different payment gateways. You can make your business exactly how you want it, from how people pay to the way things are shipped.
A huge part of selling anything is displaying your products properly. eCommerce Product Catalog makes sure buyers can see everything you have to offer in a beautiful, easy to read layout. Add multiple images, product descriptions, and price all in a WordPress post and the plugin will create a perfect catalog.
Begin with a homepage that just shows the images you want to display, then customers can click to learn more. The plugin is designed to work with almost every theme without a lot of design changes.
With these plugins, you have the power to start selling today, you just have to find the perfect product.
Recently, one of our users asked us if it was possible to export all WordPress URLs in plain text or a CSV file? Sometimes you may need those URLs for migrating a website or setting up redirects. In this article, we will show you how to export all WordPress URLs in plain text.
Why You May Need to Export All WordPress URLs in Plain Text?
WordPress comes with built-in tools to export content in an XML file. You can use this file to import your content into another WordPress site.
However, sometimes you may need a list of URLs for a number of reasons. You may need to setup redirects to a new website. You may need to share URLs with an SEO team or setup tracking using some SEO tools.
Now that you know the use-case, let's see how you can easily export all URLs from your WordPress site to a text file.
Upon activation, you need to visit Settings » Export All URLs page. The plugin allows you to export URLs for all your posts, pages, and custom post types. You can also limit it to selected post types if you want.
You can also select what data you want to export. The plugin allows you to export URLs, title, categories. There is also an option to either export this data in a CSV file or display it right on the settings page.
Click on the 'Export' button to continue.
Depending on your settings, the plugin will either display the data on the plugin's settings page or export it in a CSV file.
CSV files are plain text files with comma separated values. You can open these files in a plain text editor. You can also open them in a spreadsheet software like Microsoft Excel, Numbers, or Google Sheets.
That's all, we hope this article helped you learn how to export all WordPress URLs in plain text. You may also want to see our comparison of the best WordPress backup plugins to keep your content safe.
If you liked this article, then please subscribe to our YouTube Channel for WordPress video tutorials. You can also find us on Twitter and Facebook.
Have you ever heard of the Seahawks' 12th Man? Those who follow football know that only 11 players from each team are allowed on the field at any given time. However, Seattle's fans have been branded as the “12th Man” because of the profound effect their vocal presence and support has had on the Seahawks' games.
That's how we feel about websites. They might not be a living, breathing team member who can call leads and attend company meetings, but they are still a very important part of a business's sales, marketing, and customer relationship efforts.
When executed well, a WordPress website will help businesses achieve a number of those goals. While the goals may vary based on the type of business or services offered, there is one universal goal that every website strives for: lead generation. And to generate leads, you need to offer a way for customers to engage with you, whether that be through a phone call, email, live chat, social media inquiry, or by filling out a form. It's the latter that we're going to focus on today.
The Logic Behind Contact Forms
Today's consumer prefers a multi-channel communication approach. What does this mean exactly? Well, consumers want options. Gone are the days of phone book searches in order to find a business's contact info. There are now more options available –and consumers expect to have access to them. That's why a website is an essential contact point for every business, from the independent blogger to the multi-chain retailer.
When someone Googles the type of service or information they're looking for and finds your website, that's the first step in their customer journey. It's then your job to guide them through the rest of that journey and to the end-goal: contacting you. Regardless of which method of communication visitors to your WordPress site prefer, it's important to have contact forms at the ready. And when these are planned out properly, landing those conversions will be a piece of cake.
7 Reasons You Need Contact Forms
Every business and, consequently, every website, wants to achieve the same thing. They want to reach the right audience-the audience who needs their services, information, or products and are willing to contact you to learn more. There is a lot of work that goes into driving the right traffic to your site, but once they're there, it's your job to call them to action.
Contact forms are a very popular form of CTA as their inherent nature is to help businesses and customers (or prospects) more easily engage with one another. And because of this, there are a number of benefits you can expect from using contact forms on your WordPress website:
Make It Easy: By including simple forms that require minimal contact info in exchange for what visitors want, you're giving them a no-fuss solution to reach you. It also puts the onus on you to make that phone call or send that email, which many customers will find an attractive option.
Protect Yourself: Spammers and spambots are known for sweeping websites in search of mailto: tags, so publishing your email address information on your website may be opening you up to a number of vulnerabilities. To save yourself the hassle (and possible security threats), contact forms are a great alternative for the visitors who want to message you online.
Save Time: There are many ways contact forms help businesses save time: 1) Less of a need for cold calling. 2) Less data entry when contact forms are linked to a CMS. 3) Less need for back-and-forth when FAQs and next steps can be shared during or after the contact form submission process.
Collect Consistent Information: Whatever information is needed from a visitor (general contact info or perhaps more comprehensive answers regarding their needs), contact forms ensure that businesses are collecting the same info from everyone, every time.
Stay Organized: Contact forms are a great way to help businesses keep their customer and lead information organized with electronic records from every submission.
Generate Leads: Even if you're using forms for content giveaways, surveys, or some other more creative purpose, contact forms still provide you with a way to collect new lead information for future use. (e.g. If they signed up for a white paper in the past, they may be interested in hearing about your services when you contact them in the future).
Increase Engagement: If there's anything social media has taught us, it's that consumers want to engage with brands. A contact form offers them an easy way to do that and demonstrates to your visitors that you'll be there when they're ready to take that next step.
Remember: when used correctly, contact forms can be a very powerful sales and marketing tool; i.e. your 12th Man. Now it's time to figure out what type of form will work best for your site.
Choosing the Right Contact Form
Many websites will use a mix of contact forms in order to convert visitors through different means. What you end up choosing for your website will depend on what you have to offer. Consider the following:
Get in touch with us here at WPMU DEV.
Basic Contact Form
This is the generic form you'll find on every website. It usually appears on the Contact page, but will also be present after blog posts and at the bottom of special landing pages that want visitors to take a specific action. If your purpose is to entice visitors to contact you, this is the form to use.
Giveaway Form
The giveaway form is for businesses or marketers who can give something away for free and get visitors' contact info in exchange for it. So for marketers, you usually see this in the form of a “Free White Paper” that requests an email address in exchange for the free collateral piece.
For other businesses, the perfect example of this is when a website offers up a chance to win a free trip [gift, assessment, etc.] in exchange for the contestant's email address as an “entry fee.” Or, as in the example above from Hubspot, you can sign up to receive a free creative brief template.
Purchase Form
Any website dealing in the selling of goods or services online will have an order form. Depending on how extensive the ordering process is, these types of forms can become quite lengthy and this is usually where you'll find multi-page forms put to use.
Calculator Form
When sales people talk to customers about how their product will help them save X amount of dollars every month, they will almost always have a tried-and-true formula in place to back that up. So for websites hoping to land sales (or just get the conversation started), having a calculator form on the site is a great way to get those prospects interacting, discovering what they can gain from those services (or lose without them), and ultimately reaching out for more info.
Login Form
For websites that offer memberships or special access to parts of their website to partners, customers, suppliers, etc., a sign-up and login form is a necessary piece of that process.
Survey Form
Survey forms can serve a number of purposes. They can serve as a way to get visitors engaged with an interesting or informative topic. They can serve as a way to help you collect information for building case studies and reports. And they can serve as a way to learn more about what your audience wants and help you adjust your business model accordingly.
Subscription Form
Websites that produce regular updates to their content will usually offer short subscription forms. So for someone who produces a lot of blog posts or a regular newsletter, this form is a great way to stay top-of-mind with visitors as new updates are pushed out while collecting information for future use.
Our newsletter sign-up form.
Google Form
Chances are you've seen a Google form recently. They're very easy to set up and very flexible in terms of the type of information you want to collect (job applications, surveys, service requests, etc). Stored in the cloud with all your other Google documentation, these forms provide websites with a free way to collect information from customers (as opposed to a CMS) and keep it all in one place.
Pop-Up Form
For those trying to maintain a minimal site design or for those simply wanting to put a form in a hard-to-miss location, pop-ups are a great alternative.
Multi-Page Form
Many of the form types above could potentially take up multiple pages (especially anything having to do with the ordering process). The ultimate purpose is spreading a form submission out across many pages is to make the process of filling out so many fields a little less daunting for customers. It also helps to ease them through different (but logical) phases in order to reach the end-goal.
For more information on how to add or update forms on your WordPress website and to discover some helpful tools that will give you more flexibility and creativity in your contact forms, keep reading.
24/7 SUPPORT
Expert Superhero WordPress Support
Our support crew is waiting for you to start the conversation. We're spaced out over the globe so we can provide 24/7 support for all your WordPress needs. It's like having a personal WordPress team!
A Step-by-Step Guide to Creating Forms in WordPress
Contact forms should always be reflective of what your business does and what sort of information you need from visitors in order to take the appropriate next steps in building a relationship with them. Regardless of how extensive your needs are, the following step-by-step guide and suggested tools will help you make the most out of contact forms on your WordPress website.
Step 1: Select a Plugin
If you want to create a contact form, the easiest way to go about doing it is to use a plugin. You'll want to first identify what sort of form you need. Here are some plugins we recommend:
Contact Widget
For the easiest contact form setup, try the WPMU DEV Contact Widget. The widget has a drag-and-drop interface that makes setting up contact forms really easy. It includes all of the customizations you'd need in a form, including messaging, admin email setup, Captcha, success messages, and more.
If you're looking for a little more oomph in your form setup and want something that will grow as your form (and business) needs grow, then check out the WordPress Form Maker. This plugin will fit all sorts of contact form needs, including multi-page forms, payment integration, and survey setups. It also has a number of integrations (like Google Drive, MailChimp, and Calculator) to add extra layers of complexity to your form-making.
If you're looking to use Google forms in place of WordPress-native forms, then you'll need a plugin like the Google Drive Embedder plugin. While this tool won't help you build the actual forms, it will give you the ability to embed those forms or a link to them easily on any web page or blog post.
If you want to get creative with your pop-up forms, the Slide In plugin will give you a creative way to do this. If you want to wow your visitors with eye-catching animation and messaging, this plugin will introduce pop-ups in a new way.
For those of you who want to impress and empower visitors with a calculator form, the Calculated Fields Form builder will do just that. The plugin works with numbers, dates, financial figures, text, and more. As a bonus, they also include sample calculators to help you get started.
Here are some other contact form plugins worth taking a look at if the ones above don't quite cover what you're looking for. Once you've got your plugin of choice selected, install and activate it.
Step 2: Open the Form Maker Tool
With your plugin installed and activated, you'll want to check the sidebar in WordPress to find where the plugin is stored. For the purposes of this example, we're going to use the WordPress Form Maker plugin.
Step 3: Choose a Form Setup
Once you've found the plugin, visit the Manager or Settings so you can get started in setting up your first form. You'll have two options once you get to this screen: set up a form from-scratch or work with one of the pre-made templates.
Based on your needs, it may be easier to start with one of the pre-made templates-especially the generic Contact form template. That way it'll just be a matter of editing and customizing fields rather than setting something up totally on your own.
Step 4: Select Your Edit Style
Remember that most plugins these days offer a drag-and-drop interface, which can be a huge time saver! If you prefer manual field updates or even CSS editing, that's fine too. Just make sure you've selected the right edit style before you begin.
Step 5: Create and Customize Your Contact Form
Before you create any contact form, make sure you've identified the information you need to gather as well as what your ultimate goal will be in adding the form to your website. That will help you narrow down which fields will be absolutely necessary as well as which type of form you'll need in order to achieve your goal.
You can then start creating and customizing your contact form accordingly. Layout, color, and messaging should all be taken into consideration in this step.
When you're done, preview the form to ensure it looks as you want it to.
Step 6: Update Form Settings
Who do you want completed submissions emailed to? Where do you want visitors to be directed to once the form has been filled out? Do you need to link your CMS or payment gateway to the form for information collection purposes? There are a number of settings you'll want to pre-define before you finish your contact form setup to make sure you don't lose any information… or leads.
Step 7: Insert Shortcode into Website
Find the shortcode assigned to your new contact form.
Insert the shortcode into the page, post, sidebar, or other widgetized area in which you want it to appear on the website. Make sure to preview and test the form before publishing it to the website.
Alternate Option: Add Form Directly into Page
For those of you who don't want to bother with plugins (or don't need to because you're using Google to create your forms), there is another way to add forms to your web pages and posts.
Go directly into whichever page or post needs a form.
Click on the Contact Form (or Add Drive File for Google Forms) button to get started. You'll want to customize the field names, drag and drop fields to where you want them placed, and add or remove fields as needed.
Before you add the form into your page, make sure to update the email notifications settings accordingly. It'll automatically default to the person who created the page, so you'll want to make sure you have a proper contact person's information in place there.
Once you're done, the contact form code will be pasted into the page's text box. If you decide you want to move it to another location, copy and paste the code in its entirety to a different location (there should be no need to build it from scratch again). Same goes for editing: highlight the form code and hit the Add Contact Form button again to update the info (or you can just update the code).
Step 8: Save Your Changes
Always remember to save your work and preview the live page to verify that everything looks and works as intended.
Step 9: Close the Loop
The last step in the setup of any form is to make sure you've provided a quality experience for your site's visitors from start-to-finish. So that doesn't just mean having a fully functioning form that provides them with the product, service, or phone call which they had sought out. That means that once they submit that form, they're redirected to another well-thought-out page.
Does the contact form leave visitors wondering what's next? Send them to a landing page that explains next steps or contains a comprehensive FAQ. Does the form complete a purchase? Send them to a confirmation page. Or is the form just a subscription to your blog? Then direct them to a Thank You page or to a blog post that may be of interest. You've spent so much time designing a great website. There's no reason to lose your visitors' interest once you've got their info.
Wrapping Up
Ultimately, the purpose of a contact form is to give visitors a chance to reach out to you when they're ready. Regardless of the type of form (or forms) you use, keep in mind the following before you begin to build any of these out:
Try to only have one form on any given page. Too many competing CTAs can create a confusing and negative experience for visitors.
Keep the number of form fields to a minimum. The less work visitors have to do, the more receptive they'll be to give you their information.
Create strong, but simple messaging within the form. You want to draw in their attention and hold it until they submit their information.
Part of the reason you're using forms is to cut down on the amount of data entry required of you, so make sure to link your forms to a CMS or payment process for easy data collection and processing.
For some of these forms (like the Contact page form), you'll want to include alternate contact info alongside it so your visitors are still presented with a variety of contact options.
In terms of where to place your form, you really won't know what works best until it's been on your site. While above-the-fold forms do seem to perform better, that's not always the case. Consider using A/B testing to find the optimum spot.
If you're ever collecting customer information (in this case, you definitely are), make sure you have a privacy statement set up and that you have provided proof of it near the form.
Always, always, always make sure it's responsive. If your contact form doesn't properly work on mobile devices, you'll be missing out on a huge opportunity to convert.